2FA - Enabling and Using TOTP for your OSDC Accounts
This is a quick guide to enabling multi-factor authentication on your shell account. This will verify your identity using a one time password as well as your public-key. To do this we will be using either Google’s Authenticator app or FreeOTP. 2FA is currently only availble on your PDC or Griffin ssh accounts.
First install the application on your phone
ANDROID
iPhone
- Google Authenticator – https://itunes.apple.com/us/app/google-authenticator
- FreeOTP – https://itunes.apple.com/us/app/freeotp-authenticator
Connect your OSDC account to your Authenticator
- When your account is created you will receive a link to a QR code. This link will expire in 72 hours, so be sure to set this up ASAP.
- Open FreeOTP or Google Authenticator and add your key by either typing it in manually or taking a screenshot of the QR code.
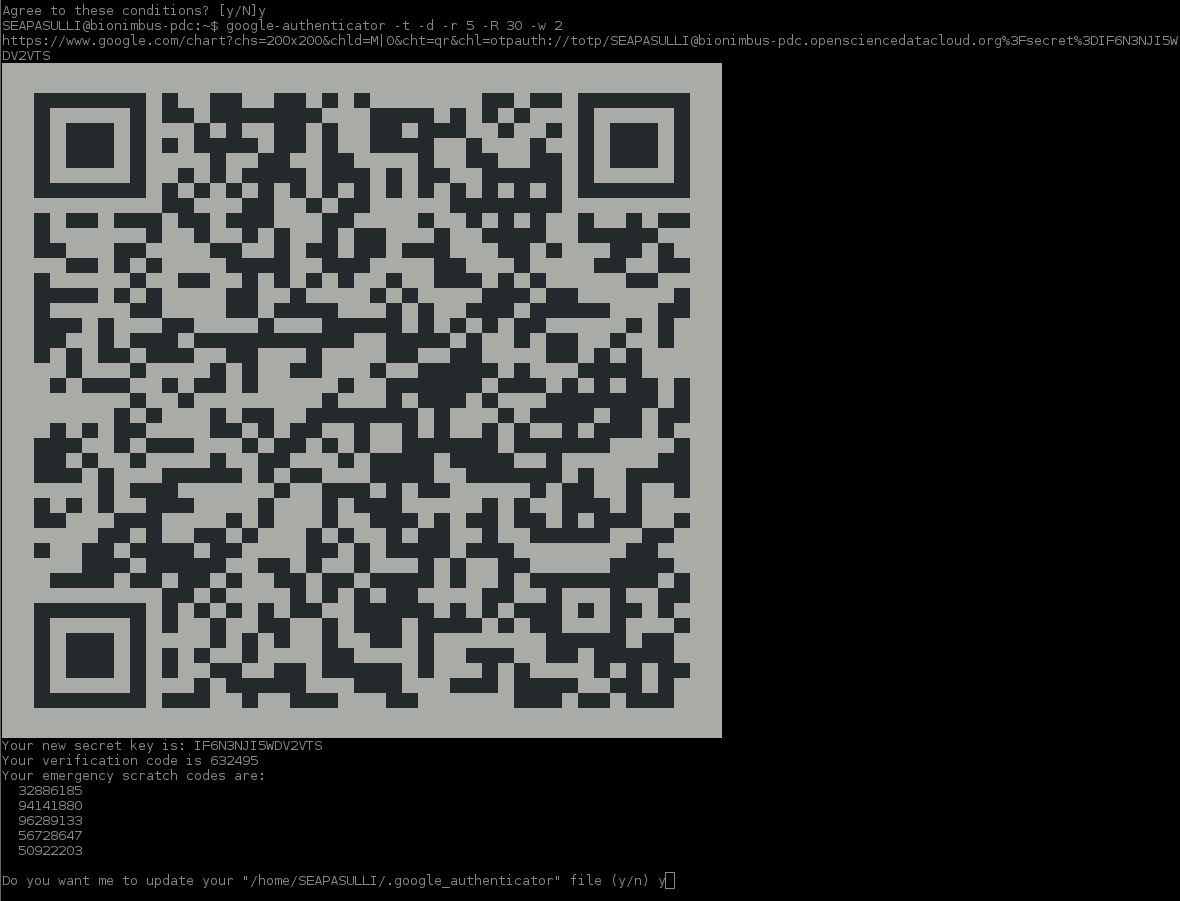
- If the QR code doesn’t display correctly you should also see a link near the top of the QR code for a web version. It should look like this:
https://www.google.com/chart?chs=200x200&chld=M|0&cht=qr&chl=otpauth://totp/USERNAME@bionimbus-pdc.opensciencedatacloud.org%3Fsecret%3DX2HOCMZW2H2KTDII
- The section of the url after 3Fsecret%3D should be your key to enter manually and should match the secret mentioned after “Your new secret key is:” below the QR code.
- Copy down the emergency scratch codes to an offline location. These are always valid and will be one of the only ways you can log into your shell account if you lose your authenticator.
- Answer y to update your .google_authenticator file.
Login to the OSDC account and test 2FA
- Log into your account
- you should be prompted with a verify:

- open your authenticator (Google Authenticator or FreeOTP)
- Type the number displayed into your shell session after verify:
- No text should display. This is for security reasons.
- Press Enter
- That’s it!
Client setup instructions
FreeOTP
- Open FreeOTP
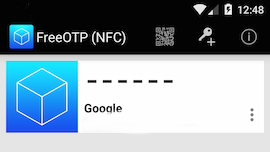
- For QR:
- Tap the miniature QR code in the top of the app.
- Place the QR code mentioned in your shell session in view of your camera. You may have to step back to get the entire QR code in view.
- For manual entry:
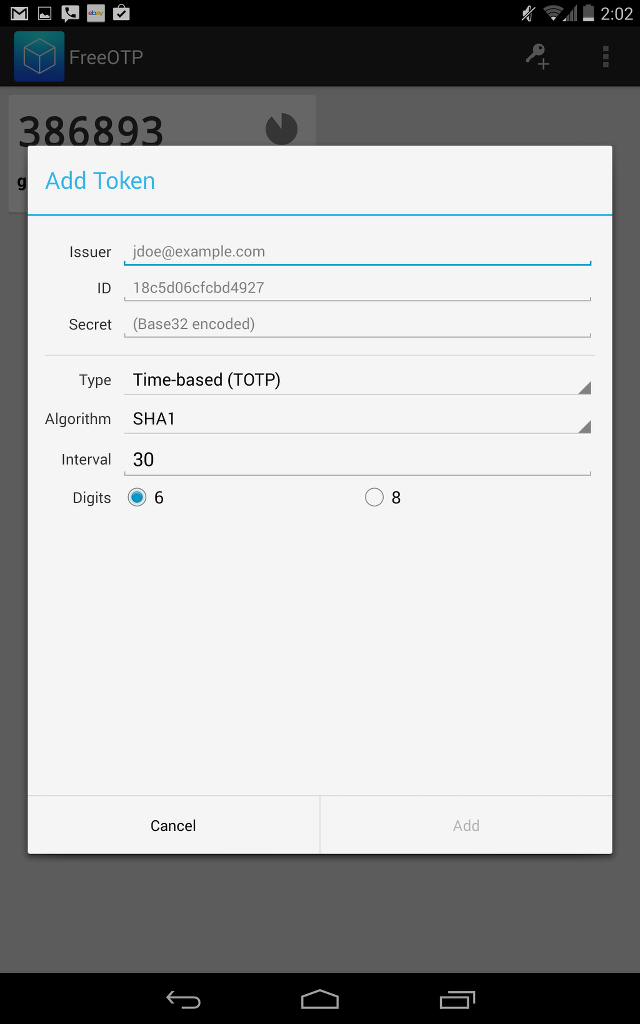
- Tap the key+ icon in the top of the app.
- Enter your account name as the e-mail address.
- Under the e-mail address type in a name for your authenticator IE: PDC
- Copy the “secret” into the Secret section.
- Select TOTP type.
- Select 6 digits.
- Select SHA1 Algorithm.
- 30 seconds for your interval.
- Click Add.
Google Authenticator
- Open Google’s Authenticator app
- For QR
- Tap the plus inside the circle in the lower right corner.

- Tap Scan a barcode
- Place the QR code mentioned in your shell session in view of your camera. You may have to step back to get the entire QR code in view.
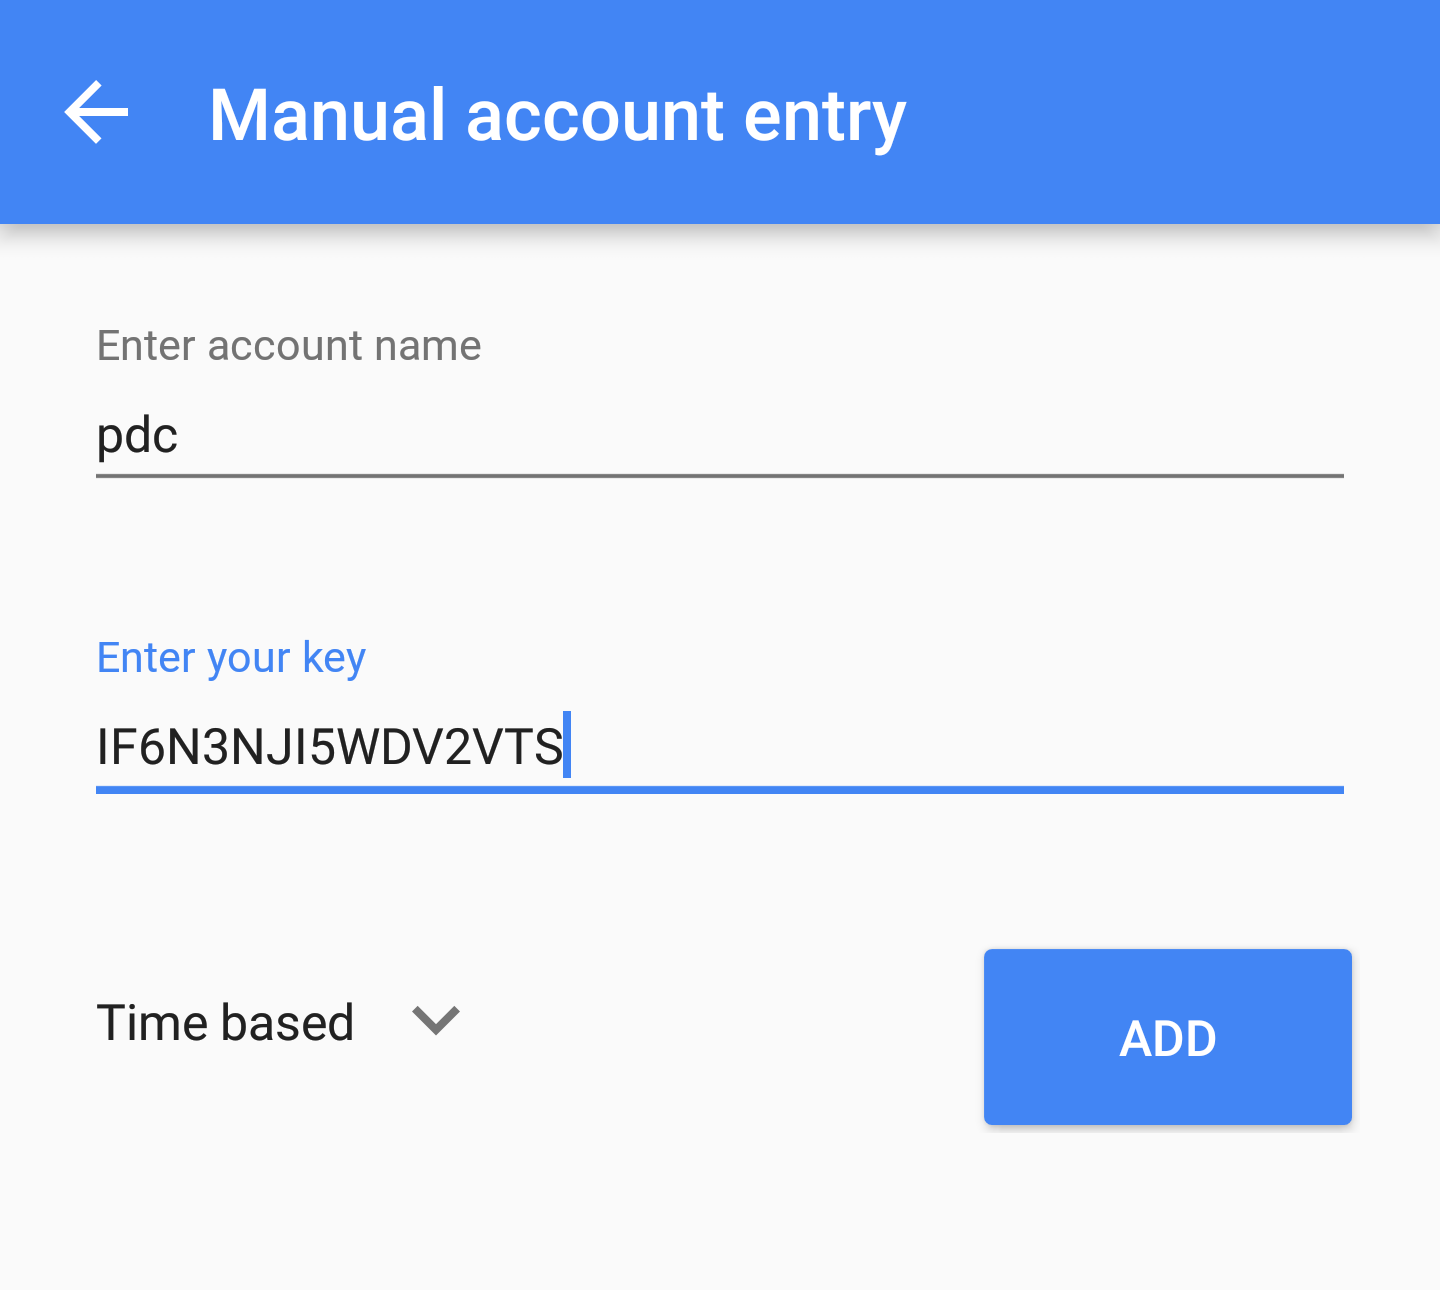
- For manual entry
Tap the plus
Tap Enter a provided key
Fill out a name for your authenticator ie ACCOUNT@bionimbus-pdc
copy the secret into the Enter your key section.